mfxposé #6: Menic Rüttimann

Wednesday 23 September 2009
We've finally got the interviews put together after a long hiatus!

This mfxposé featured artist is Menic Rüttimann, from the menix miniatures blog. He's done some beautiful work, particularly with ancient and historical periods. So surf on over to his blog for some in-depth info.


INTERVIEW

Daniel: Give us a little bit of background on yourself and where you started.

Menic: Well, I was born 1970 and brought up around dad’s N-Scale Baltimore & Ohio and Western Maryland model rail-road. As a kid I glued and painted 1/72 aeroplanes from World War I and II. As a fantasy role-playing teenager I wouldn’t paint my miniatures. I thought it sacrilegious to mess up the antique flair of pewter and patina with acrylic paint!

Daniel: What was your main source of inspiration for painting miniatures?

Menic: Hmmm, I guess the lust for painting loads of miniatures grew slowly but economics and geography where in the way. So serious painting started in 1994. I was always interested in games of strategy and tactics and started playing the Warhammer Fantasy Battle system. I built one big Bretonnian army, always lost, but kept on painting. Heraldry and the realistic background of my army finally led me to historical wargaming.

Early_Swiss_Workbench_What_Next_02_blog

Daniel: What are your worst colours?

Menic: I hate red-yellow colour combinations. And the worst colour to highlight is red.

Daniel: And your key inspirations?

Menic: Archaeology, museums, textiles. I guess everything from Art History to Architecture, Sculpture, and building decoration. Even concepts from books, pictures and Illumination.

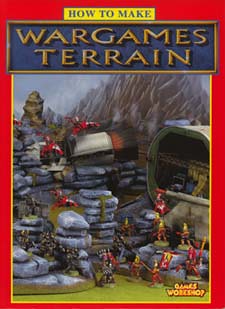
Daniel: Tell us a bit more about your passion for historical wargaming and painting this specific genre.

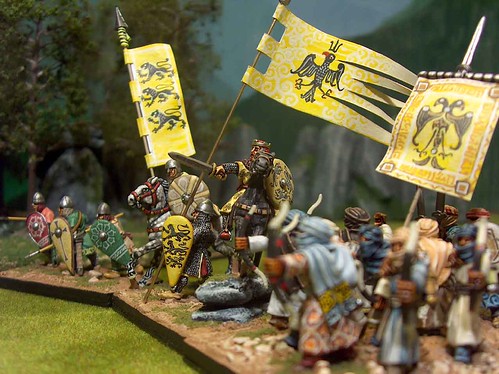
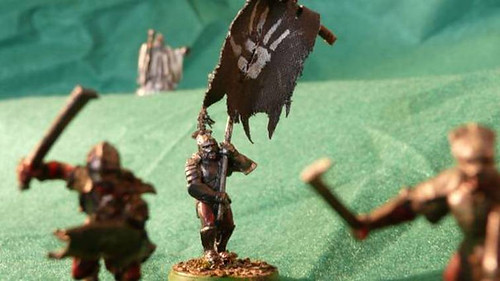
Menic: Sure. Nowadays I build ancient and medieval armies for Phil Barker's “De Bellis Antiquitatis” (DBA) and its fantasy spin-off “Hordes of the Things” (HOTT) and I still enjoy every game.

Seleukiden_II-19a_15mm_Blog_El+Rest_on_the_March_01

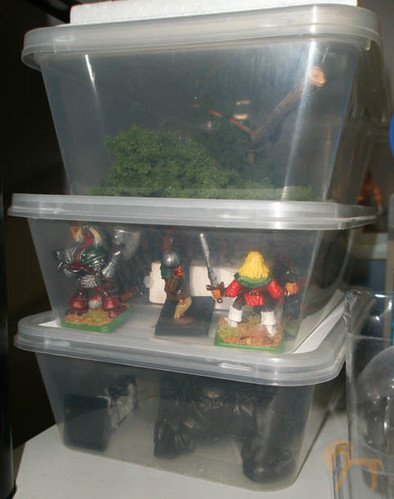
The good thing about DBA-armies is you don’t need a lot of figures. That way I can get finished in time, can use the army in play and move on to the next project and still have a life.

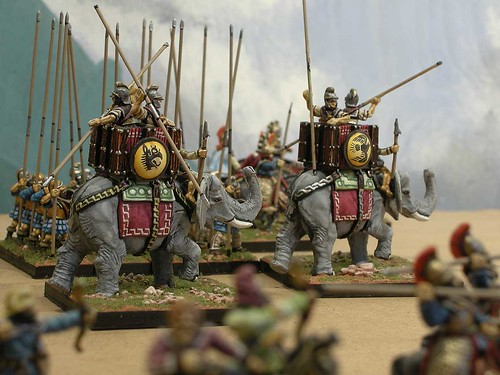
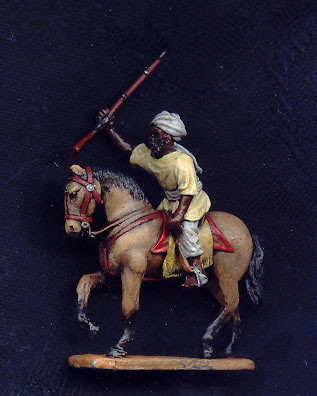
I started DBA in 2006 and can now field all kinds of medieval 10th-13th century armies and Saracen troops from North Africa, Spain, Syria and Sicily. Ancient Parthians and Seleucids are ready too.

I still have a lot of painted minis which didn’t make the transition from Warhammer to DBA basing standards.

Daniel: So what other sort of work do you get up to between projects?

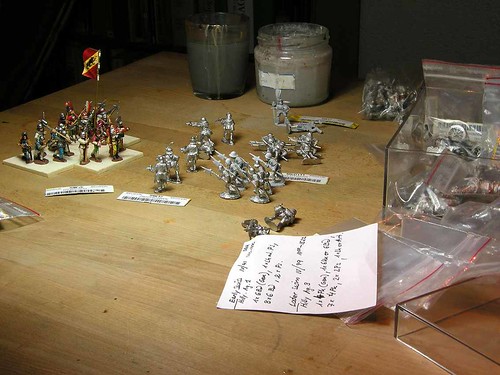
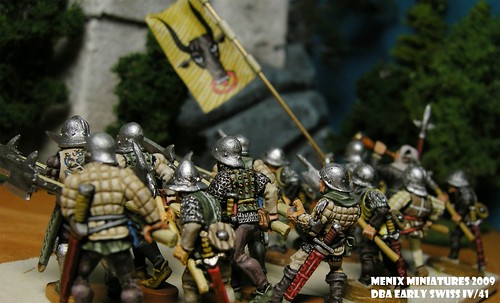
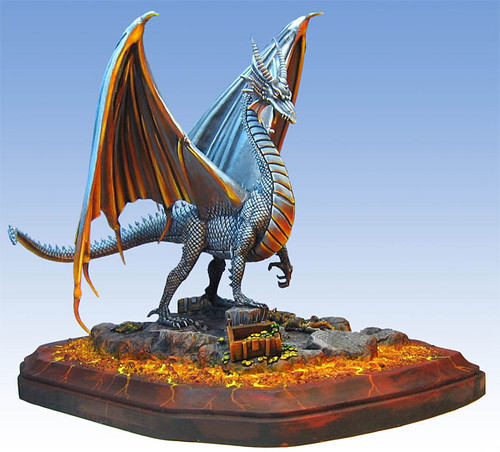
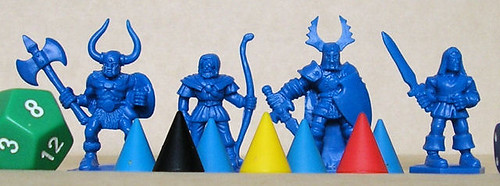
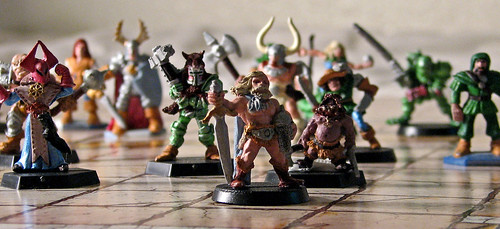
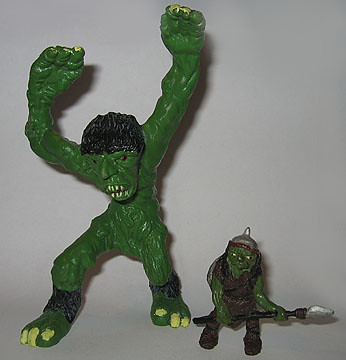
Menic: In between I paint dragons and orcs for a fantasy army I hope to finish before my son looses interest. Right now I’m halfway through with an early Swiss army. It consists of about sixty halberdiers and some skirmishers. In game it is often hard to win with them but the mass of miniatures will have some psychological impact on the opponent, I hope.

Early_Swiss_No_Bases_09

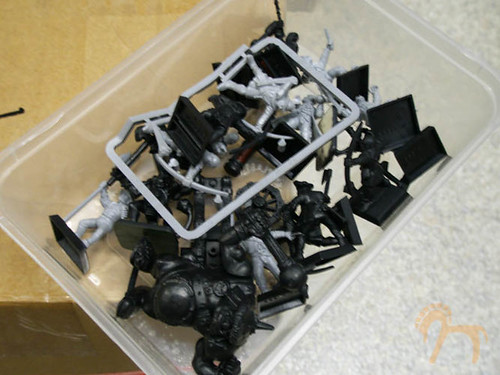
Of course there is a lot of unpainted lead: Byzantine Cavalry, Turcopoles, Knights from the 13th-15th century, a pile of 15th c. Swiss pikes, a hillock of WH-Knights.

Early_Crusader_Knights_St-John_Detail_Blog

My aim is to paint all kinds of special or generic troops for every army in western Europe and the Mediterranean from the 10th to the 15th century. As for the Ancients, I do them in 15mm and the theme is Persia and the Mediterranean World. The 15mm stuff is still new to me but the next army will be Galatians, wild naked Celts in Turkey, haha!

Daniel: What tips can you give our readers on miniatures painting?

Menic: I think there are three important things to remember in good miniature painting:

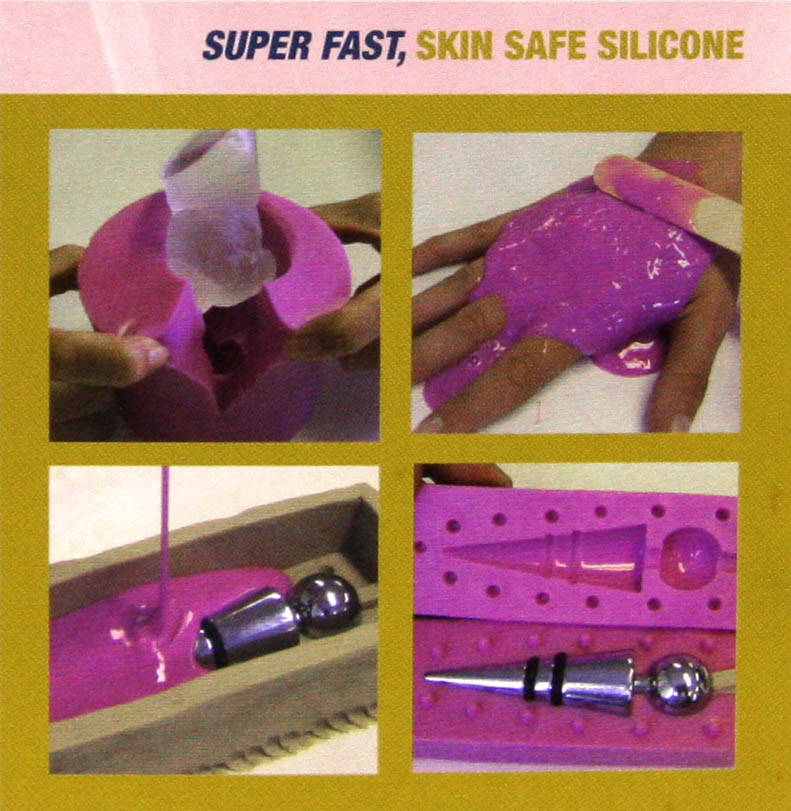
1.) I try to do a clean job. This means the technical side of painting. How do I apply liquid plasticoid stuff on a metal background so it gives a neat surface and a trimmed border?

I try to control the consistency of the paint. I use a lot of water, but sometimes just as much as to keep the pigment flowing down the brush. I use expensive brushes with Rotmarder-hair, size 1, 2, 3.

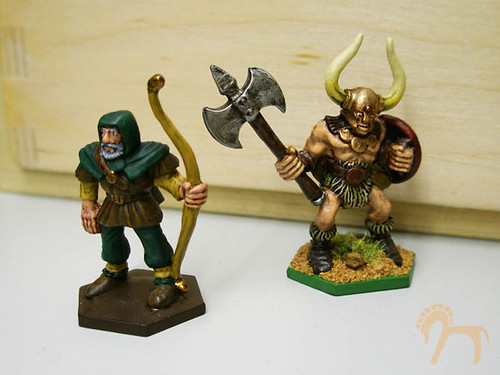
I’m constantly fighting my brushes, I sometimes punish size one by painting intricate stuff with size three. I start with white primer and then paint the skin first, mostly face and hands. For the clothing I mix colours a lot and start with a darker middle-toned colour as a first layer. Then I paint the deepest shades followed by two highlighting layers.

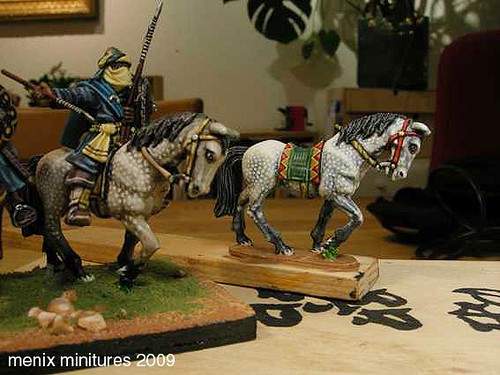
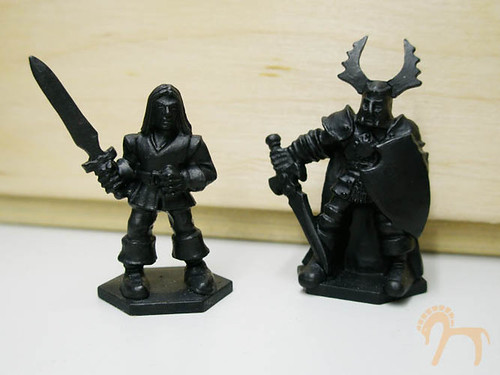
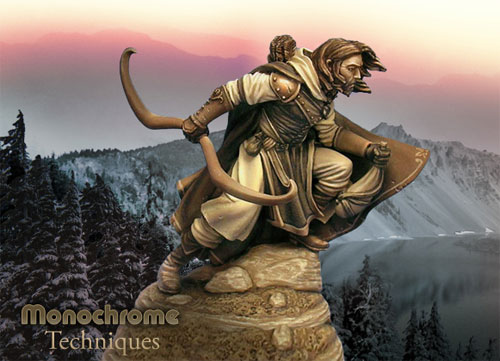
I use different techniques to simulate different materials: for fury textures (horses) a kind of wet-in-wet technique, or a black underground for leather and metal – which helps details stand out, Eg. belt and buckle, armour, shoes etc.

Berber_Cavalry_Vorgabe_01

2.) I want to keep it simple. This means I try to find a useful colour scheme for the clothing. To many different colours will blur the overall appearance. I avoid using more than three.

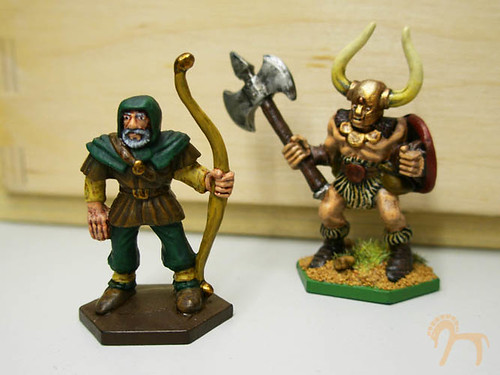
Keep an eye on alternating dark and light colours. Paint a tunic in egg shell, let it be covered by a dark brown cape and use simple colour scheme. It's realistic and always makes a good appearance on the game-board. Keep it simple also means abstraction: tricky stuff like embroideries or heraldry looks best if applied with lively strokes.

Staufer_General_06

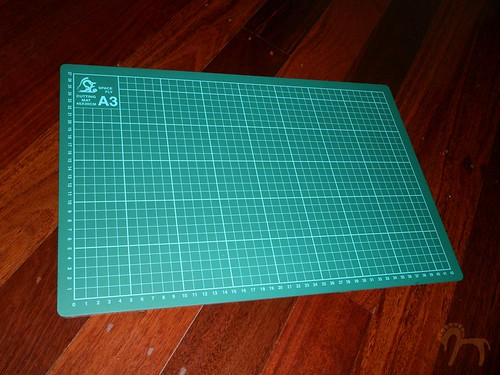
I learn a design with paper and pen first. I try to break it down to basic forms and lines. As soon as I can draw it freehand I start to scale it down to the right size. Then I practice with paint on paper. After some time I feel confident enough and give it a go.

Big goofs get erased with a blob of paint the same colour as the primer. The process gets faster with growing experience.

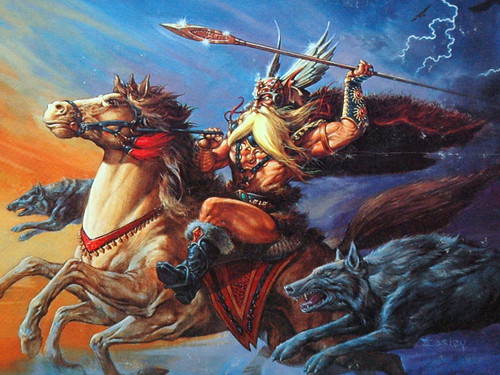
3.) I paint the light. I like to “break” colours which seem too saturated for my liking. I imagine the sun shining on these and I simulate this bleaching effect by mixing in some grey. I use the more powerful colours for rich cloaks, banners or other special equipment.

For some more great tips, tricks and tutorials, check out Menic's blog.

UPCOMING: Keep an eye out for some more featured artists and companies ...

mfxposé #5: Barnes Products

Friday 3 July 2009
Those of you looking to try your hand at a bit of sculpting are in for a treat once again. This week we're featuring Barnes Products in our mfxposé. We had a chat to people there and have included for you some of their tutorials on using patina's and Pinkysil.

SOME BACKGROUND

Barnes Products was founded in 1986 by Kevin and Maria Barnes. Kevin had a vision to introduce the latest technologies in materials such as polyeurthan, silicone rubber, gypsum that met world class standards to the Australian Industry.

Today, Barnes is run by Kevin and Maria’s daughter, Nicole Barnes, who continues to supply the highest standard of materials and service to Australia, New Zealand and many other countries.

THE BUSINESS

Their head office is based in Bankstown, NSW, where they do product testing and development, as well and packaging and distribution.

In recent years Barnes have opened retail outlets in Newtown (NSW) and Richmond (VIC) where customers get a personalised service plus technical advice based on the vast experience of their employees.

Newtown (NSW)

View Larger Map

Richmond(VIC)

View Larger Map

Walking into a Barnes store is like a treasure-trove for anyone into special effects, film prosthetics, miniatures sculpting, moulding and related fields. They've got a really wide range of products for a variety of different uses.

They've furnished us with a couple tutorials and some details on products that would suit our miniature modelling purposes. Still, check out the website or head on over to the store as you'd be surprised what you'll come across that'd be useful for a miniature effects artist.

PATINA'S

The Barnes range of Patina’s retail between $16.50 and $33.

BarnesPatinas

Patina’s are used for aging metal finishes, like obtaining rust and greening finishes on metals. The great thing about them is you don’t have to start with a metal object, but can paint with a metal paint prior to application to achieve your desired effect.

Patina’s can be used in the following way:

1.) Select the item you wish to work with (ideally it can be made from plastic, wood, resin or plaster but other materials should work as long as it can be painted)

2.) Paint your item with Barnes metal paints (three coats works best)

3.) Once the metal paint is dry, apply Patina to your item using a spray (you can use a spritzer bottle) or brush (with a regular bristled paint brush).

4.) Leave your item to dry. Different Patina’s have different drying times (no longer than overnight)

PINKYSIL

Another material which is great for replicating items is Pinkysil (RRP $35.20 for 500g). You can use it to replicate your favourite characters, buildings and other terrain shapes easily.

BarnesPinkysil500gm

Pinkysil is a skin safe silicone and quick setting (only half an hour).

Use Pinkysil in the following way:

1.) Stick your chosen item into the middle of a plastic container (a disposable plastic cup works well).

2.) Pour the Pinkysil according to the enclosed instructions. It's a simple 1:1 ratio by volume.

3.) Stir the Pinkysil until an even pink colour is achieved.

4.) Pour the Pinkysil over your chosen item in the plastic container.

5.) Wait approximately 30 minutes and then remove the pinkysil from your plastic container and remove your item.

6.) You’ve now created an exact replica mould of your item.

You can use Barnes resins to make solid replicas with products such as TC808, which they tell me is ideal for figurines and prototyping.

BarnesPinkysilSuperFast

For some more great hints and how-to's, check out this link at Barnes' site.

UPCOMING: Keep an eye out for some more featured artists and companies ...

mfxposé #4: Dark Sword Miniatures

Friday 12 June 2009
We've had too many requests to profile a miniatures company to ignore. So get ready for our mega-article, this week in mfxposé we're featuring Dark Sword Miniatures. After getting in touch with Jim Ludwig, he was more than willing to send us endless pics of their jaw-dropping work.

Dark Sword Miniatures, Inc. is Jim's company and is located in Minnesota, USA.


DARK SWORD MINIATURES

Dark Sword Miniatures, Inc. was founded in 2002 in order to fill a gap in the miniatures industry that had moved steadily towards very stylised and sometimes over-the-top miniatures at the expense of more realistic miniatures.

Founder Jim Ludwig grew up on the classic Grenadier and Ral Partha sculpts in the 1980's and 1990's and was dismayed to lose both Grenadier and Ral Partha in the mid 1990's due to the collapse of the hobby market from the hot new card game "Magic the Gathering" dominating the hobby stores.

Jim's favorite Ral Partha license was the Larry Elmore line of miniatures they produced. Jim who had become acquaintances with Larry Elmore over the years and had begged Larry to take his license to Reaper Miniatures once Ral Partha closed up shop, but for some reason Larry did not do so as it was not at the top of his radar in those days.

So he boldly told Larry: "... heck, if you are not going to do something about this, I will start a small miniatures company as a sideline business and hire top sculptors and painters to do your artwork justice."

Larry Elmore simply responded: "OK, write up a proposal and let me review it."

Dark Sword Miniatures was born ...

Elmore Dragons Set #5

Dennis Mize and Tom Meier were at the top of the list for realistic sculptors that could pull off what was needed. Dennis had done a large amount of work on the classic Ral Partha Silver and Steel series and other Elmore miniatures. Tom had done some work on it as well.

Dennis signed on quickly and was given the Elmore Masterworks line to sculpt as Dark Sword wanted to ensure consistency across lines. Keith Parkinson and Tom Meier came on next to start the Parkinson Masterworks line.

Jim Ludwig was always very fond of the "Fab Four" from TSR which included Larry Elmore, Keith Parkinson, Jeff Easley and Clyde Caldwell. These four artists really put TSR on the map in terms of amazing artwork back in the 1980's and 1990's.

Kingsgate: The Art of Keith Parkinson

Odin Riding Forth on the Cover of "Legends and Lore" for AD&D

clyde caldwell 032

Red Dragon by Larry Elmore

Dark Sword had a plan and very soon Jeff Easley and Clyde Caldwell were signed on board along with Dave Summers to sculpt up Dragons and other assorted minis. Dave Summers had sculpted some of the best dragons ever produced for Ral Partha including the Great Red Dragon (Easley artwork) and the Golden Dragon of Chaos (Elmore artwork).

Dark Sword slowly ramped up over the next few years with a steady stream of boxed set releases from Tom, Dennis and Dave sculpting. They then offered their miniatures in single/blister pack format due to the demands of collectors and gamers. This prompted the start of their Visions in Fantasy range of player character types to fill in the gaps of the amazing artwork from the Fab Four. The sculptor Gael Goumon was brought on to add to this line.

VIF Ranger

Dark Sword's premium miniature lines were mainstays at the Origins Award's every year for Best Miniature/Miniature Line of the Year. Dark Sword took home top honors in 2005 with their Elmore Dragons Miniature Line sculpted by Dave Summers and Dennis Mize.

Dark Sword lost a couple of dear friends in October 2005 and March 2006 with the passing of Keith Parkinson and Dennis Mize. Jim tells me:

"... Their talent is still felt today and there is not a week that goes by that I do not fondly think of them and our conversations. They were both at the very top of their game in terms of skill-levels at the time of their passing ..."

The search for a top-notch sculptor brought Dark Sword to Jeff Grace who Jim had been keeping an eye on since Jeff entered back into the Freelance sculpting market after his tour of duty with WizKids. Jeff Grace had been trained by Dennis Mize and Dave Summers at Ral Partha.

Jeff also had a keen appreciation of the artwork we were working from. He was a natural choice and quickly ramped up to follow in Dennis Mize's footsteps as a key Dark Sword sculptor. Little did Jeff know that he was considered for the Caldwell Masterworks line before Dennis Mize offered to sculpt that line in addition to the Elmore Masterworks line.

Detail on sculpt GRRM Line

While all of this was happening, a surprise email from a Mr. George R.R. Martin happened to pop into their email box praising their miniatures and asking if they were of the 54mm scale (which is always a nice compliment). It turns out Mr. Martin was a huge miniature fan and really liked the realistic miniatures they were doing. George had signed on with a huge multi-million dollar company called Testors Models to bring his miniatures to market.

After a couple years of spinning their wheels, they lost the license and Dark Sword was offered the chance to add another key license to their line. Jim was a huge fan of the books and jumped at the chance. Tom Meier and Jeff Grace are heading up sculpting duties on the line with Dave Summers jumping in on certain pieces as needed. Most miniatures in the line are in the standard 28-30mm scale which is the industry norm these days, but a few of the miniatures are getting the 54mm treatment as well.

Female Summoner & Desert Wings

Dark Sword works with a very talented group of painters that paint up their studio collection - Matt Verzani has been with them since the very beginning. Susan Wachowski paints almost all of their dragons, and Marike Reimer is now painting a good deal of Dark Sword releases. Alison Scheirman, Rhonda Bender, Anne Foerster, and Jen Haley have also painted miniatures for the Dark Sword studio collection. They are a very talented bunch - no question about it.

Alfyn GRRM

Looking forward, Dark Sword wants to simply focus on their existing premium miniature lines and really fill them out. All too often, companies get eyes bigger than their wallets and spin out of control and lose focus.

Dark Sword tries to keep things really tight by only working with a limited amount of sculptors, painters and licenses. Dark Sword has over 230 miniatures in their lines thus far and that number keeps on growing and should exceed 250 miniatures by the end of 2009.

You can check out their award-winning miniature lines at: www.DarkSwordMiniatures.com

UPCOMING: More on materials, reviews and a few other overdue posts ...

mfxposé #3: Gerry Webb

Monday 25 May 2009
This week we're being treated to an interview with Gerry Webb of Castaway Arts. I contacted Gerry after reading a great interview with him in Broadsword magazine dating back a few years.

Gerry is a superb miniatures sculptor based in Cairns in the tropical North of Australia and tells us:

"... My wife Carolyn and I are in the midst of a long (endless?) renovation of a traditional ‘Queenslander’ home. Between that, work and real life I'm kept pretty busy ..."

But we've been lucky enough to score an interview, some pics and few handy tips along the way...


View Larger Map

INTERVIEW

Daniel: How long have you been sculpting miniatures?

Gerry: About 20 years or so, originally just a few for fun, but seriously for mass production for over 10 years.

Daniel: What first inspired you to become a sculptor?

Gerry: A few friends asked me to make some figures for them, types not then available. I'd done some conversions and was keen to have a go at scratch building. The key step was finding a mouldmaker who could turn the master figures into production moulds.

Daniel: Which artist in your field do you admire most and why?

Gerry: Tom Meier, The Perry twins, Richard Ansell's work on the Minden Miniatures range. I like a slim, in scale sculpt, with life-like proportions. Of course there are a whole bunch of factors that get in the way. For example, thin items have to be accentuated so they'll cast successfully, plus a lot of folks prefer the exaggerated style in various degrees.

Daniel: What was your favorite project to work on?

Gerry: That’s difficult to answer, my current project is always my favorite. In the Ancients I have an interest in early, Biblical types.

David & Goliath by Greg Blake 2

Daniel: What was your hardest project to complete?

Gerry: Possibly the Ark of The Covenant set, my first venture into brass sheet work. The lid actually fits on the main box. I probably should have made it as one solid piece, that would have been much easier.

Daniel: What are your favorite armies?

Gerry: I have to say colonials. Since turning to this dark side I haven't looked back. There is simply so much to do, it's endless. Every time I even look like running out of subjects, someone comes forward with an interesting, new subject they've been researching.

Daniel: What armies or ages would you like to sculpt in the future?

Gerry: I’m still on the Colonials theme, there are lots of subjects waiting in line there. I'm currently working on additions to the Chinese and Indian ranges. I would like to have a go at Seven Years War but it’s on the back burner for the moment.

Daniel: Where do you source your materials and tools from?

Gerry: My favorite sculpting putties are Green stuff, brown stuff, and milliput. Green stuff is great for clothing but it has a 'bubblegum' texture when it sets. Brown stuff sets hard and can be filed and sanded. Jeff Valent Studios in the USA is my usual source for Green stuff and brown stuff. Wire armatures are mainly made from paper clips, or champagne bottle wire (which is a lot more pleasant to source).

Champagne Wire Sculpture Step 1

I have some old dentist tools, and some more recent purchases from the Army Painter range.

Daniel: Do you have any custom-made or special equipment for sculpting?

Gerry: My most used tools are home made. The first is a large sewing needle stuck in a brush handle, the other is a cut down wooden paint brush handle, whittled to a semi-rounded shape. These, and a dentist spatula do 90% of the work.

acrylic spatula

Daniel: What tips and tricks can you offer our readers?

Gerry: Give it a try, and keep trying. Hide your less successful sculpts in a bottom drawer, and show off the ones you like.

In the early days I had some masters break in the moulding process, simply because I hadn't made them strong enough. I learned it's no good making great detail if it's not on a strong armature and base. That's why I use paper clips, they're tricky to shape, but won't give way in the moulding press. I'm also using a lot more brown stuff/milliput to form the basic figure, before finishing the surface detail with green stuff. It makes a much stronger master figure.

These days there's on-line information that will teach you all you need to get started. Sculpting is no longer a mysterious art. A Google search is a good place to start.

Daniel: What's the best aspect of your job and the wider industry?

Gerry: That's easy to answer, I have to say the friendships formed, worldwide. I'm in regular contact with creative, helpful and enthusiastic people everywhere. I don't get to meet them all face to face, and others I only get to meet occasionally, but there is a great sense of sharing and camaraderie.

It's fun to talk to folks who have our miniatures, and find out how much they're enjoying them. Sometimes they put them to very creative uses that I hadn't dreamed of. I also enjoy comparing notes with others in the business, discussing the merits of various materials and techniques. That's where a lot of my tips and techniques came from, but in the spirit of fairness it has to be a two way exchange.

Finally, I have to give credit to Nic Robson, and the rest of the gang at Eureka Miniatures, including Rob Walter of Eureka USA. Nic is a mould maker without peer, and has been very patient with some of my more impractical designs, requests and deadlines. Without such helpful and generous people none of this would have happened.

mc1 painted

UPCOMING: Thanks to Gerry we've kick started a series of posts covering sculpting - mainly as a result of all the requests we've received from readers.

NEXT: Back to Materials and a few other overdue posts ...

Materials #4: Terrain Basics

Monday 4 May 2009
There's so many different ways you can build terrain - and we're talking everything from trees and landscapes to water effects, mountains, buildings and general set design.

As you read and saw back in mfxposé #1 with Giuseppe Borzone, terrain and buildings can be constructed using almost anything.

But with this post we're going to look at some of the more basic materials you'll need for this sort of work - both off-the-shelf stuff and custom-made.

SOME RESOURCES...

Games Workshop have been selling their "How to Make Wargames Terrain" books for some time now. Here's a scan of my old copy, I think I bought this one around 2002:

HowToMakeWargamesTerrain1996

The updated version currently on shelves is available here and looks like this:

HowToMakeWargamesTerrain-New

One of the great things about the book is that it covers a broad spectrum of terrain tips and techniques that can be applied to projects that are not solely for wargaming and table-top game use.

There's a decent amount of ideas on what alternative materials you can use to create walls and rockery, from cork tiles to bits of cardboard and off-cuts of expanded polystyrene. All these sorts of materials can be sourced from your regular hobby shops like Art on King, HobbyCo, Castle Hill Hobbies, and so on. You'd be surprised what you'll find at places like Barnes and Adelaide Moulding & Casting Supplies even though these guys specialise in areas like film industry miniature effects and prosthetics work.

Online Tutorial: Check this out: Tips & Tricks 9: Designing Rocky Landscapes

DVD Tutorials: I bought this Woodland Scenics DVD at Tin Soldier for around $9 bucks during a sale a few years back. I'll review this and blog about it at some point, so stay tuned.

WoodlandScenics-YouCanDoItDVD

MATERIALS

All the usual suspects are listed as must have items for terrain building in the Games Workshop book. I'm going list them here along with a few extras:

Balsa Wood: popular for modelling material cause it's light and easy to cut. You can use this for your timber buildings, bridges and so on. File and cut pieces to shape and paint them with your undercoat, then base colours and drybrush for good effect.

Modelling Clay: I use DAS but there's plenty of others out there. When it's exposed to room temperature air it will dry hard. Store it in a zip-lock bag to keep it from drying. You can do a whole bunch of things with this sort of clay and can model an endless variety of shapes. Use any number of items to create surface texture and shape (old brush heads, tools, sticks, twigs, forks, spoons etc...). You'll even find ready-made moulds at places like HobbyCo. Even though they're not specifically made for DAS clay modelling, it works just as well in my experience. Note that it will crack if you let it dry too quickly. I like to also use Green Stuff for finer details and touch-ups.

Here's an example of a rough job with DAS for quickly adding some weight to the base of a top-heavy model:

mfx,P2130009a

Expanded Polystyrene: You'll find this stuff everywhere, try not to chuck any of it out if you can help it. I've noticed more and more packing polystyrene is unsuitable for model making. Particularly the ones that look as though they're compressed balls of polystryrene. They're difficult to cut and shape as required. The stuff you find inside boxes carrying electronics and computers are great. Some of the shapes will inspire unusual dungeons, castles and sci-fi docking bays. Note: only use water-based paints and glues as others can melt it. It's difficult to work with for larger projects and not as sturdy as corrugated cardboard, but you can use polystyrene to "block" out your basic shapes (crumbled newspapers and masking tape works great for filling out areas, particularly for mountain ranges). Then you coat it with your filler, PVA/Sand mixture, DAS clay or other material for surface detail. Be sure to check out Reverse Garbage for some massive amounts (and sizes!) of polystrene shapes.

Cork Tiles: Hardware stores and hobby shops supply these. I've never really had to use these, but they're great for bases and other more sturdier walls that you may need for large castles and so on. They're easy to cut and glue together.

Cocktail Sticks: Easy to find & a million uses.

Pumice Stone: You'll find these in places like PriceLine for around $6 or so. They're great if you smash them to bits with a hammer for some rubble and great shaped rocks. Because of the pumice surface being rough and partially porous, you can paint, ink-wash and drybrush them to get some great effects.

pumice-stone,1

I'm actually going to use this one as a megalith or cromlech-like structure in a grasslands scene with a few archer woodsmen and Celtic-style miniatures.

Comlech.png‎

Dscn5212-mane-braz_800x600.jpg

Sand: Even easier to find. Look at the different grades of sand you'll find at your nearest beach. You can find it easily enough in pet shops for fish tanks or bird cages. Mix it with PVA glue to textures your bases and other flat surfaces. Paint the required areas with PVA and then scatter with sand. Some people prefer to dip the surface into sand, others simple pour it over. I use whatever suits the specific job at the time. Once it dries paint it over, use some ink washes, let it dry and then drybrush for a nice effect. You could go with earthy rock tones, mossy stones or even a winter scene by drybrushing white for a top layer of snow. You can also mix the sand with the PVA to form a paste that can be spread on your scenes with a spatula (makeshift or bought). I prefer to just use makeshift spatulas from bits of plastic shapes cut from milk cartons and yogurt tubs. You can use this for mountains, old castle walls and ruins, river-beds and the list goes on...

Straws: Great for futuristic piping and the like, especially the bendy ones.

Drain Mesh: Used for making bonsai and looks good as dungeon-grating, along with pieces of different sizes for strainer mesh (gauze wire).

Anchorage Wire: Also used for shaping branches in bonsai creation. You need a strong, waterproof adhesive to hold the wires onto rock and other surfaces. Epoxy resin is good but takes a day or so to harden - you can use a quick-drying adhesive made in Japan specifically for use on rock plantings for bonsai.

Others: The list can just go on with things like Masking Tape, Cardboard Tubes, Corrugated Cardboard pieces, Ready-mix Filler, Corks, Plasticene, Broken Rulers and bits of wood, Twigs and dried Stems, Roots from plants (washed and dried), Bendable Wiring (all sizes and types).

twigs1

TOOLS

Hot Foam Wire Cutter: There's a bunch of different brands out there, some cheaper than others.

Assorted: Naturally your tool-kit can be made up of anything you find useful and that does the trick. Generally I only have a very limited set of "specialist" type tools that I've bought, the rest you can make yourself or wing it with similar items from bargain stores or raiding the kitchen. These ones below include a range of tweezers, mini-files, a pair of cutters, sculpting tool, hobby knife and a magnifying glass prop.

ArcaeonMiniatureFX,materials,11

Check out this link at Scrap Dragon for a well-priced online supplier of accessories for model makers.

OFF-THE-SHELF TERRAIN

There's some great off-the-shelf terrain that you can buy from places like HobbyCo and Tin Soldier. This mountain/rock piece below is from Ziterdes (from HobbyCo in the QVB Sydney). They're very light weight, have some great detail and can save your life when on a deadline or doing a last-minute rush on a job (this one's called the Rock of Raburgon).

ZieglerTerrainDesign-Ziterdes-12146Berg-Stein-von-Raburgon,1

Another good place to check for ready-made rockery is your average pet store. I generally find that the larger commercialised pet stores don't have what I'm after. Usually it's the little hole-in-the-wall type shops that have a really good variety of fake rockery for fish tanks. There's a pet shop on Burwood Rd, Burwood that I passed this morning. They've got some great pieces in there that can be modified. I'd recommend ripping off the plastic plants that they sometimes come with (and save them in your "bit-box" for later).


View Larger Map

Some of them look great just as they are. But I always prefer to give them an undercoat and re-paint or even just a partial touch-up by drybrushing the rocks, adding ink washes and then drybrushing some highlights.

GRASS

This stuff is great and you find it in the strangest places. It's ready-made interior decorator's "moss" that you'll come across in design shops and other home furnishing stores. It's perfect for speeding up your terrain building process. With this particular one it's about 8.5" inches in diameter and costs around $10 bucks. I got it on special for $7.95 at Vivalino in Balmain.

moss-vivalino2

The undergrowth along with the static flock can be bent, folded, cut and shaped however you like. I prefer to prepare a base (cork tile), then block out the hilly sections with pieces of polystrene glued firmly (or small pieces of crumbled newspaper taped down). Then lay the moss "mat" over it and use pins to pin it into the cork tile in the shape that I need.

Using a combination of pins and glue, once it's in place you can start adding the PVA Glue & Sand mixture detailed above, or ready-mix filler, to fill out sections left gaping by the polystyrene block underneath. Once it's dried give it a good undercoat and then paint it up (base colour, maybe an ink wash, then drybrush) to look like dirt and clay or rockery beneath a grassy hill. I like to add either onto the moss mat or around the edges, some Underbrush Clump-Foliage in a variety of colours, some lichen, a different coloured grass to blend with the deep green of the ready-made moss from Vivalino. This will give your scene some good tonal variety when it comes to the grasses, plants and earth associated with the composition.

moss-vivalino1

Try not to allow the moss mat to look too much like an obvious ready-made addition. Actually paint glue over portions of it and scatter a different coloured static flock grass over random sections, make sure that it blends well into the next colour and add a few clumps of underbrush foliage and snippets of lichen to mimick real-life natural growth. Search on Flickr or study images at your local library on how hinterlands, Scottish moors, plains, grasslands and natural hillsides look.

When Spring Begins Painting The Fields - Happy Earth Day -

NEXT: Terrain Basics continues with Ibigawa rocks (I promise!) and Native Australian dried plants ...

Materials #3½: Daylight Simulation Bulbs

Thursday 23 April 2009
Yep, I've got to get out of this habit of blogging "Materials #½" posts, but this one is a little side-step to the Terrain Basics post soon to be published.

DAYLIGHT SIMULATION BULBS

I've been meaning to post about this for a while, and my two new bulbs arrived today in the mail (one's a BC bulb, the other is an ES screw-in).

DaylightSimBulbs1

I only ordered them from Scrap Dragon (Condong, NSW) about 2 days ago! Talk about quick service. I've posted about these guys in the past.

Essentially, the great thing about these bulbs is that they simulate a natural northern light that is almost identical to daylight. They make colour matching more accurate than under yellow halogen bulbs which distort the colours. The light is also restful for the eyes.

DaylightSimBulbs2

Okay, so they're more expensive than a standard lightbulb, but it's well worth it. Scrap Dragon have them for a good price (only $22 bucks) and also stock a bunch of lamps in different styles.

I definitely recommend investing in them. They work great, and the light from my lamp is so much better.

LampDaylightSimBulb1

NEXT: Materials #4 with Terrain Basics...

mfxposé #2: Nicolaas Smit

Wednesday 22 April 2009
Our featured artist this week is Nicolaas Smit. He's a 21 year old Sydney-based digital artist who spent most of his younger years, in the late 90's through to the early 21st century, painting Warhammer and "... creating terrains to entice my young imagination". He's ventured through a variety of sets including Orcs, Chaos, Ultramarines and LotR.


INTERVIEW

Daniel: What was your inspiration to start painting miniatures?

Nicolaas: I was always a keen artist, sketching, painting on canvas, cardboard and sticky tape was my best friend as a young kid attempting to pry open every corner of my imagination to create anything I liked at the time. I remember seeing my first Warhammer battlefield at a family friends house, the artist/owner was not home at the time and I had strict rules as to not dare touch. I remember a layout of Tyranids and Space Wolves, so tempting it was to reach out for a closer look. Back home I began creating my own "Warhammer" from cardboard, foil, bluetack was great. It wasn't till months later my parents decided to invest in my first set of Warhammer. I remember choosing a set of Ork Boyz, that's when my Warhammer days began.

Daniel: Which artist in your field do you admire most and why?

Nicolaas: As a young kid I looked up to the adults and older teens of the industry. I only purchased my sets from the Warhammer store that was located in Miranda Fair NSW so I knew the staff well and would regularly stare in awe while they painted their models within the store. I was also inspired by the many talented artists that regularly painted there.

NicolaasSmit-WarhammerUltramarines3

Daniel: What was your favourite miniatures project to work on?

Nicolaas: In my later years of Warhammer I worked on a few LotR sets, I had made a few terrains in theme with the movie, my favourite being a replica of the stairs from the Moria Mines. It was my largest project created and I think spent $50 alone on expanding foam to create rock like forms. Two people were needed to lift the creation in its completed form.

NicolaasSmit-LoTR2

Daniel: What was your hardest project to complete?

Nicolaas: I think my hardest projects to complete have been anything that has yet to be completed. Unfortunately there are a number of uncompleted projects. Mostly some overworked single sets. I also have a number of sets that became very monotonous and especially when you have 50 Orcs to paint that are almost identical across the range. Grrr!

Daniel: What are your favourite miniature sets to paint?

Nicolaas: I've always enjoyed painting my LotR sets, in particular the Rohan horseman. I enjoyed the fact that I could put so much variation with colour scheme and details for the horses themselves but also with the armour and flags the riders wore.

Daniel: What miniature sets or genres would you like to paint in the future?

Nicolaas: Something different that's not available, I'd love to see a miniature Star Wars set or something awesome like that.

Daniel: Where do you source your materials and tools from?

Nicolaas: Although I bought most of my paints and brushes from the Warhammer store I equally loved purchasing from Vaggs Hobbyshop which is still located outside of Miranda Fair, NSW. I'd occasional buy materials there but nothing beats a visit to the beach for some sand, dirts and rocks for terrains, catch some surf while you're there.


View Larger Map

Daniel: Do you have any custom-made or special equipment for painting, sculpting and modifying your miniatures?

Nicolaas: I used to regularly use a foam cutter which I made from scratch using a coat hanger wire, batteries and some thin wire, and lots of my favourite sticky tape. [Damn, that's cool, I'll have to mock one up and give it a try, thanks for the tip - Daniel]

Daniel: What tips and tricks can you offer our readers?

Nicolaas: My favourite trick which I always shared with my mates back in the day was a technique I regularly used to create blood and gore. It involves a few drops of super glue which then you drip some watered down blood coloured red paint onto the wet super glue. The glue and paint form some chemical bond and instantly dry into some goopy looking mess. I often used it on dead Orc carcases on terrains I made, the results were never the same and occasionally you'd get some decent intestine designs and the like, oh those were the days.

NicolaasSmit-LoTR1

NEXT: Terrain basics, more materials and finally, Ibigawa rocks...

Boardgame Figurines

Tuesday 21 April 2009
As a follow-up to our previous post on some unknown figurines, we've tracked down the boardgame, thanks to our readers.

DungeonQuest1

DUNGEONQUEST

Developed in Sweden in 1985, it was released by Games Workshop in 1987 and is currently out of production. Check out this Wikipedia article on the fantasy boardgame.

File:Dungeonquest.jpg

Expansion sets and more figurines were created to extend gameplay, BoardGameGeek has a great listing on it with plenty of interesting images of painted and unpainted miniatures.

I've found a few more photos on Flickr featuring painted versions of the characters, including the one embedded below.

This Land is Our Land

I'd love to find the time to finish painting these miniatures and will keep you posted with progress pics once I do.

P4150021a

P4150028a

Wanted: Miniatures & TSR Figurine

Thursday 16 April 2009
As a little side-step from our usual blogging, occasionally I'll be putting up "Wanted" posts like this one for various odds and ends.

TSR LJN AD&D TERRIBLE TROLL

Produced by TSR, this LJN Advanced Dungeons & Dragons figurine was part of the "Terrible Troll & Goblin" figure set.

TerribleTroll1a

I've found a bunch on eBay in the States, but I'm looking for someone in Australia.

Does anyone have this and want to swap or sell it?

Send me an email if you have just the Terrible Troll and are interested in selling it. I don't need it to be in the box-set or to come with the little goblin.

We're looking to modify and re-sculpt certain parts of the troll and paint it up. I'll definitely be posting progress images on this blog once the project gets underway.

BOARDGAME MINIATURES (Updated 21/04/09)

A number of years ago I was given a set of 4 miniatures from a boardgame made sometime during the late 80's or early 90's. As you can see I've only painted two of the four. Their scale average is around 33mm, so a fraction taller than your standard Milton Bradley / Games Workshop miniatures (~28mm).

P4150028a

P4150020a

Does anyone recognise these?

I know this post is called "wanted", but in this instance I just want to know where they're from.

Send me an email if you know which boardgame they're from. I'm pretty sure it was an early TSR or Milton Bradley production but I can't seem to find it on Board Game Geek.

UPDATE 21/04/09

Thanks to the emails we've received in response to the unknown boardgame figurines above, we've found out that these guys actually from a Games Workshop production: Dungeonquest © 1985 / 1987. Check out our new article for details.

Materials #3: Brushes & Equipment

Wednesday 15 April 2009
Now time to return to our Materials series for a look at brushes and equipment. A few people have emailed me about this so I think it's time to blog about brushes ...

BRUSHES

With the brushes it depends on what sort of quality and longevity you're after.

Sable hair Brushes

Paint brushes are available in many shapes and sizes, and are made from animal hair or synthetic fibres. There's so many different brands to choose from it is true that the better quality the brush, the more money you'll save in the long run. If you use them correctly, clean them properly and store carefully - you'll be guaranteed a brush that will last.

Sable-hair are the best quality brushes out. The Kolinsky's can go up to $50+ per brush and are the absolute best in the world. They're generally associated with watercolour painting and are made from hair taken from the tail of a sable. The hair is hard-wearing, shapes well and can hold a point. It's also got great spring and flexibility and will hold water well. You need to take care of these as they'll be your best brushes. Some artists have moral issues with the production of the brush, which I perfectly understand.

There are so many others out there, squirrel hair, ox hair, goat hair, mongoose, sabeline, etc ...

What you'll essentially want to look for are Sable-hair brushes and Taklons (more on this below).

I've bought some Neef sable-hair brushes - they work wonderfully as long as you always keep the point. I use straws of different sizes to "cap" the brushes.

ArcaeonMiniatureFX,materials,2

TIP: Always, always keep the tips pointy. Don't ever bash the brush into the base of your jar - or leave it sitting in the jar brush-end down. This will forcibly splay your brush tip as the bristles and hairs loosen in the water. Here's a little technique my water-colour illustration teacher showed us ...

Clean it thoroughly with cold water:

1.) Just jiggle it in your "dirty-water" jar, softly rub on the jar edge a few times and wipe excess paint with a lint-free cloth.

2.) Jiggle the brush in another jar of clear water, lift it out of the jar and hold it beside you as you sit in the chair.

3.) Flick it once. The action is like cracking a mini-whip but holding the brush how you normally would hold a pen.

4.) Then gently and swiftly glide it through your free-hand using the same motion as though you were pulling off the cap from a pen in one motion - but with a loose grip.

This will flick that main drop out of the reservoir of the brush-head and make a sharp point as you glide over it. Then carefully insert it into your straw cap.

NOTE: Dry, stubborn paint around the ferrule can be softened and removed with a little washing-up liquid or shampoo, followed by a good rinse in clean water.

Taklon synthetic Brushes

Taklons are your standard synthetic-fibre brushes - sometimes called acrylic brushes. These are the ones you'll usually find miniatures artists using (particularly those not familiar with sable-hair).

They're really cheap and easy to find. You can pick some good ones up for around $8 at various stores. I think Tin Soldier and Art on King (both in Sydney) have the best supplies for what I'm after.

The problem with your Taklon synthetics is that they'll hook much quicker or split down the middle eventually (hooking is when the tip of the brush literally bends over by itself). The reason why is because it's an extracted synthetic (polyester and nylon) so it will eventually want to bend in the shape that it was first "extracted" or pulled from.

Some people would prefer to go through a dozen taklons than use one sable-hair brush. Mainly because the hair is literally plucked from the tail of a sable.

When going for a taklon brush, I've found Tin Soldier has a good range of A.J. Leeman brushes (and others) with a great pen-like grib for a handle and is particularly useful when doing fine detail. For me at least, it reduces the amount of strain on your thumb, index and middle fingers and your thenar muscle. Mainly because you're not straining to do fine strokes with a thin handle.

MAKESHIFT STORAGE BOXES

Okay, I've got a number of things I use for storing and sorting my materials - be it tools, paints, miniatures, etc.

Naturally cardboard boxes of all sizes are great, I use these regularly but I'm leaning towards switching everything into clear containers so I can find things more easily.

Old Asian take-away containers, the plastic sort, are great. Throw them in the washing machine (be careful they can warp with all that hot water) or wash them thoroughly in the sink.

TakeawayBoxes1

I generally use them for storing spare miniatures I've undercoated in the past.

SpareModelsStorage1

I also use them for storing foliage like the Underbrush Clump-Foliage (Medium Green) that you can see in the picture (I got this from HobbyCo). This makes it easy to spray or paint glue onto twigs and dip them into the foliage sorted in different take-away containers. We'll have a tutorial on making trees later on.

UnderbrushStorageBox1

OTHER STORAGE BOXES

I've bought this great storage box from Bunnings at Rockdale for around $14 bucks, only to realise I could've gotten the same one and more variety from Kmart at Hurstville for around $8 bucks! I'm going to buy a couple more from Kmart and will post up some pics on how I've used them.

This one is great for storing ad hoc bits and pieces I use regularly.

ArcaeonMiniatureFX,materials,4

CUTTING MAT

I've got here a cheap-as-chips A3 cutting mat that only cost around $6 bucks at Roni's at Burwood Plaza in Sydney. I've seen this go for well over double (and sometimes) triple that amount. Don't bother spending top dollar for this, go down to your nearest bargain basement junk shop and see what you can find. It's self-healing and just as good as any other cutting mat.

ArcaeonMiniatureFX,materials,7

Why a cutting mat? Well it works well just as a board for leaning on when cutting off the excesses on your die-cast miniatures. Keeps your desk a little tidier. But it's best for when you obviously cutting custom cardboard and polystyrene / foam-board shapes when creating terrain and buildings.

NEXT: Ibigawa rocks and other tools of the trade ...